실습 (SLAM only)
- 결과
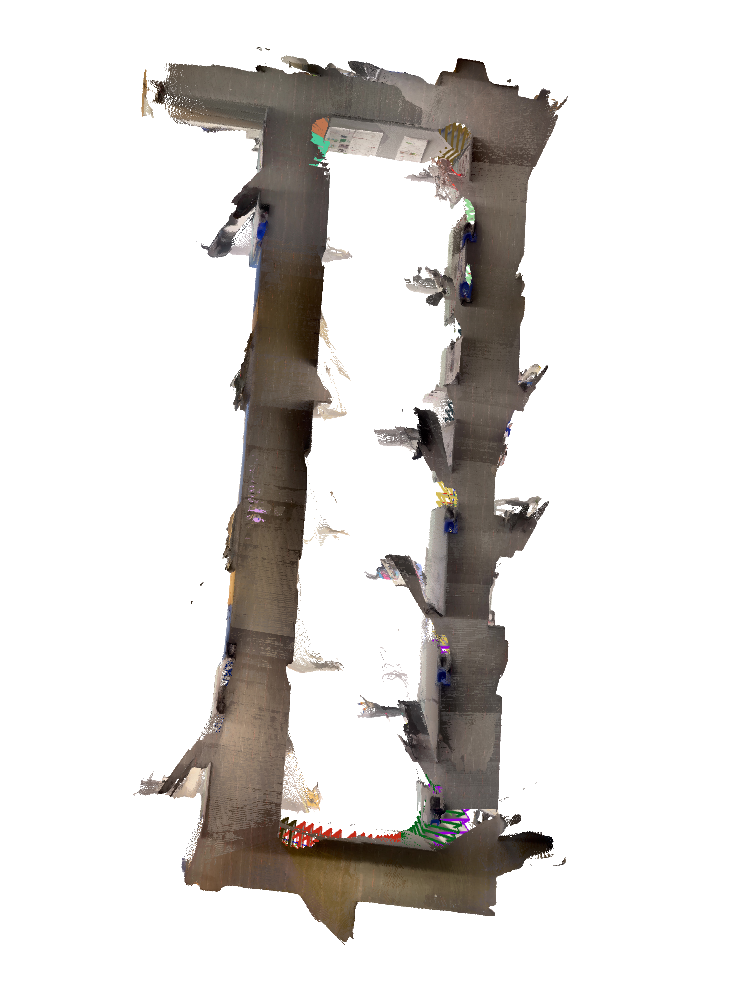
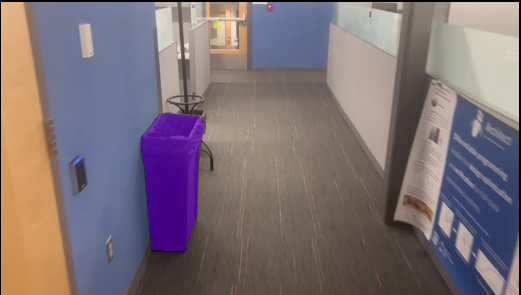
office 데이터셋 (default)
외부 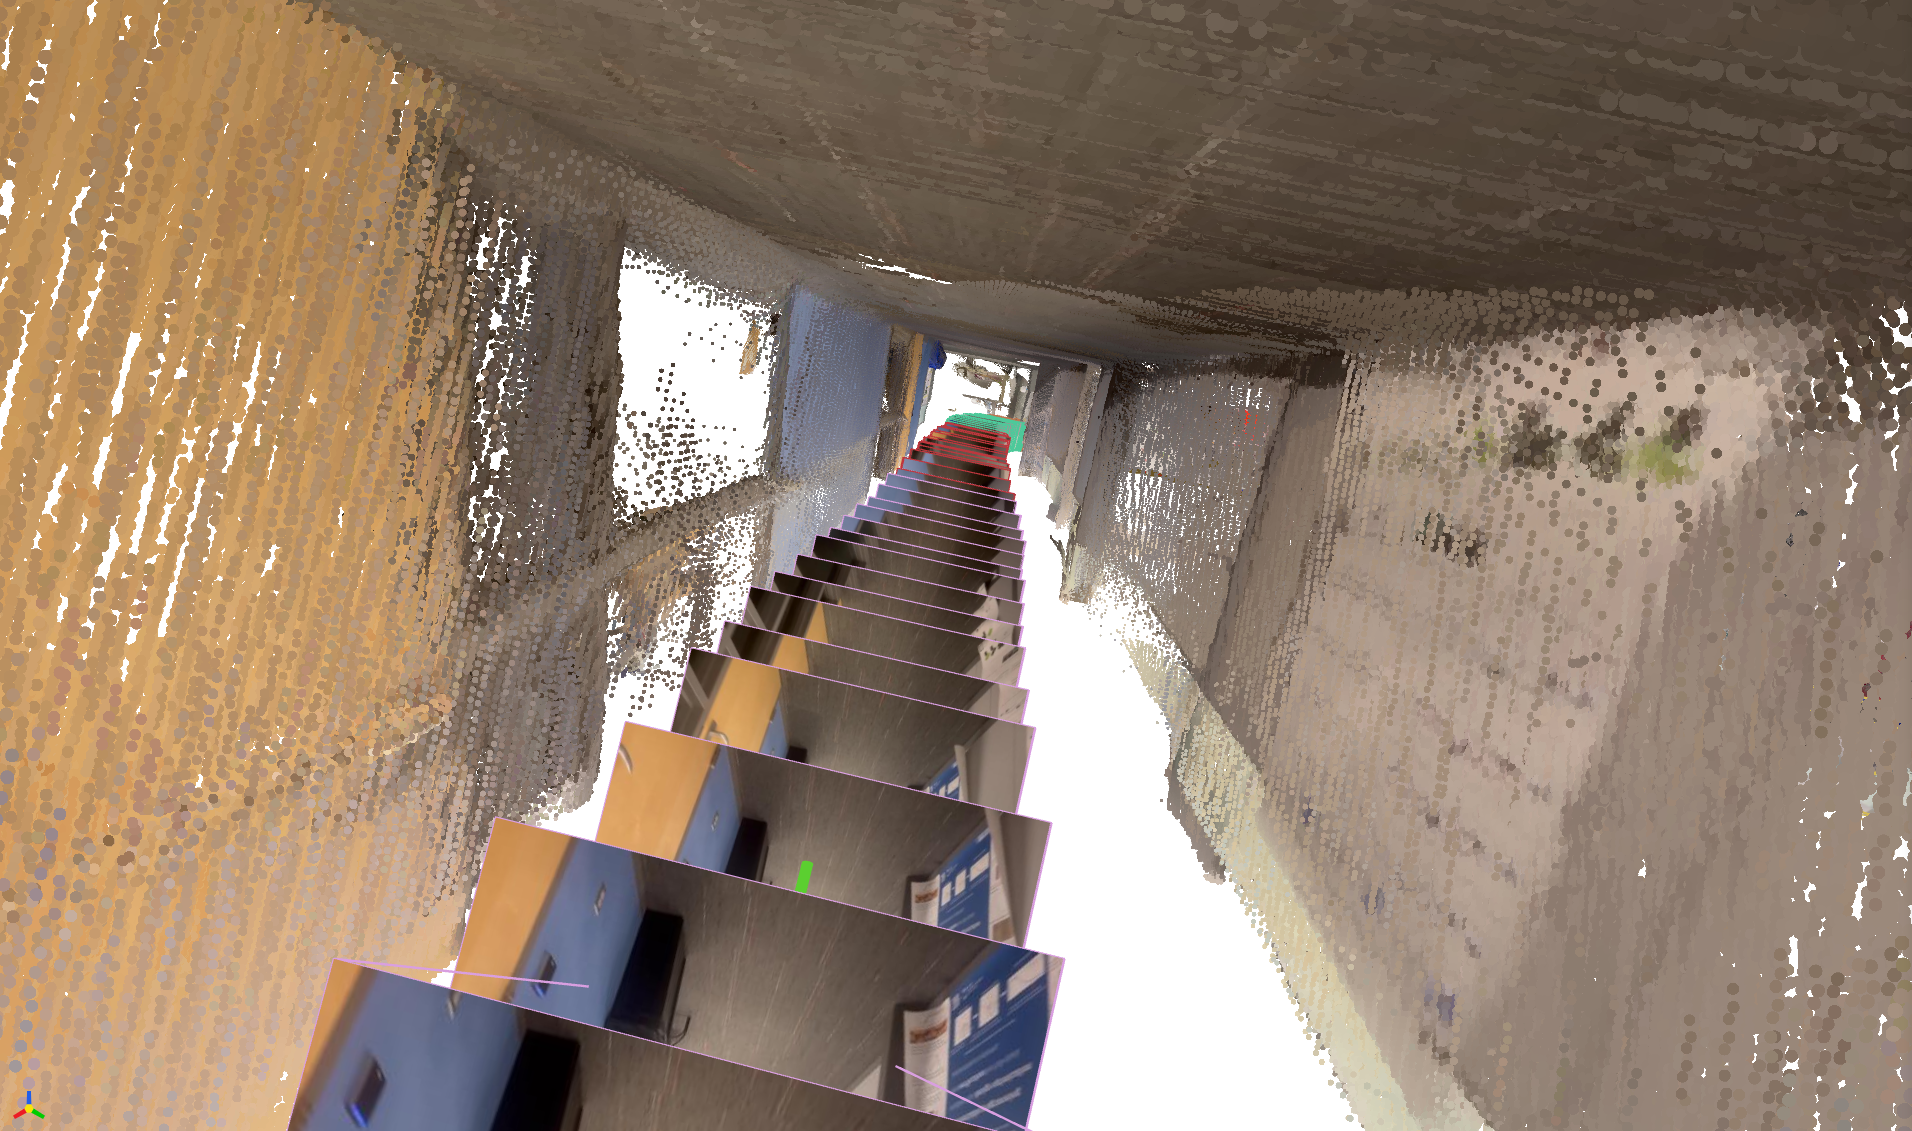
내부
커스텀 데이터셋
- nr_room
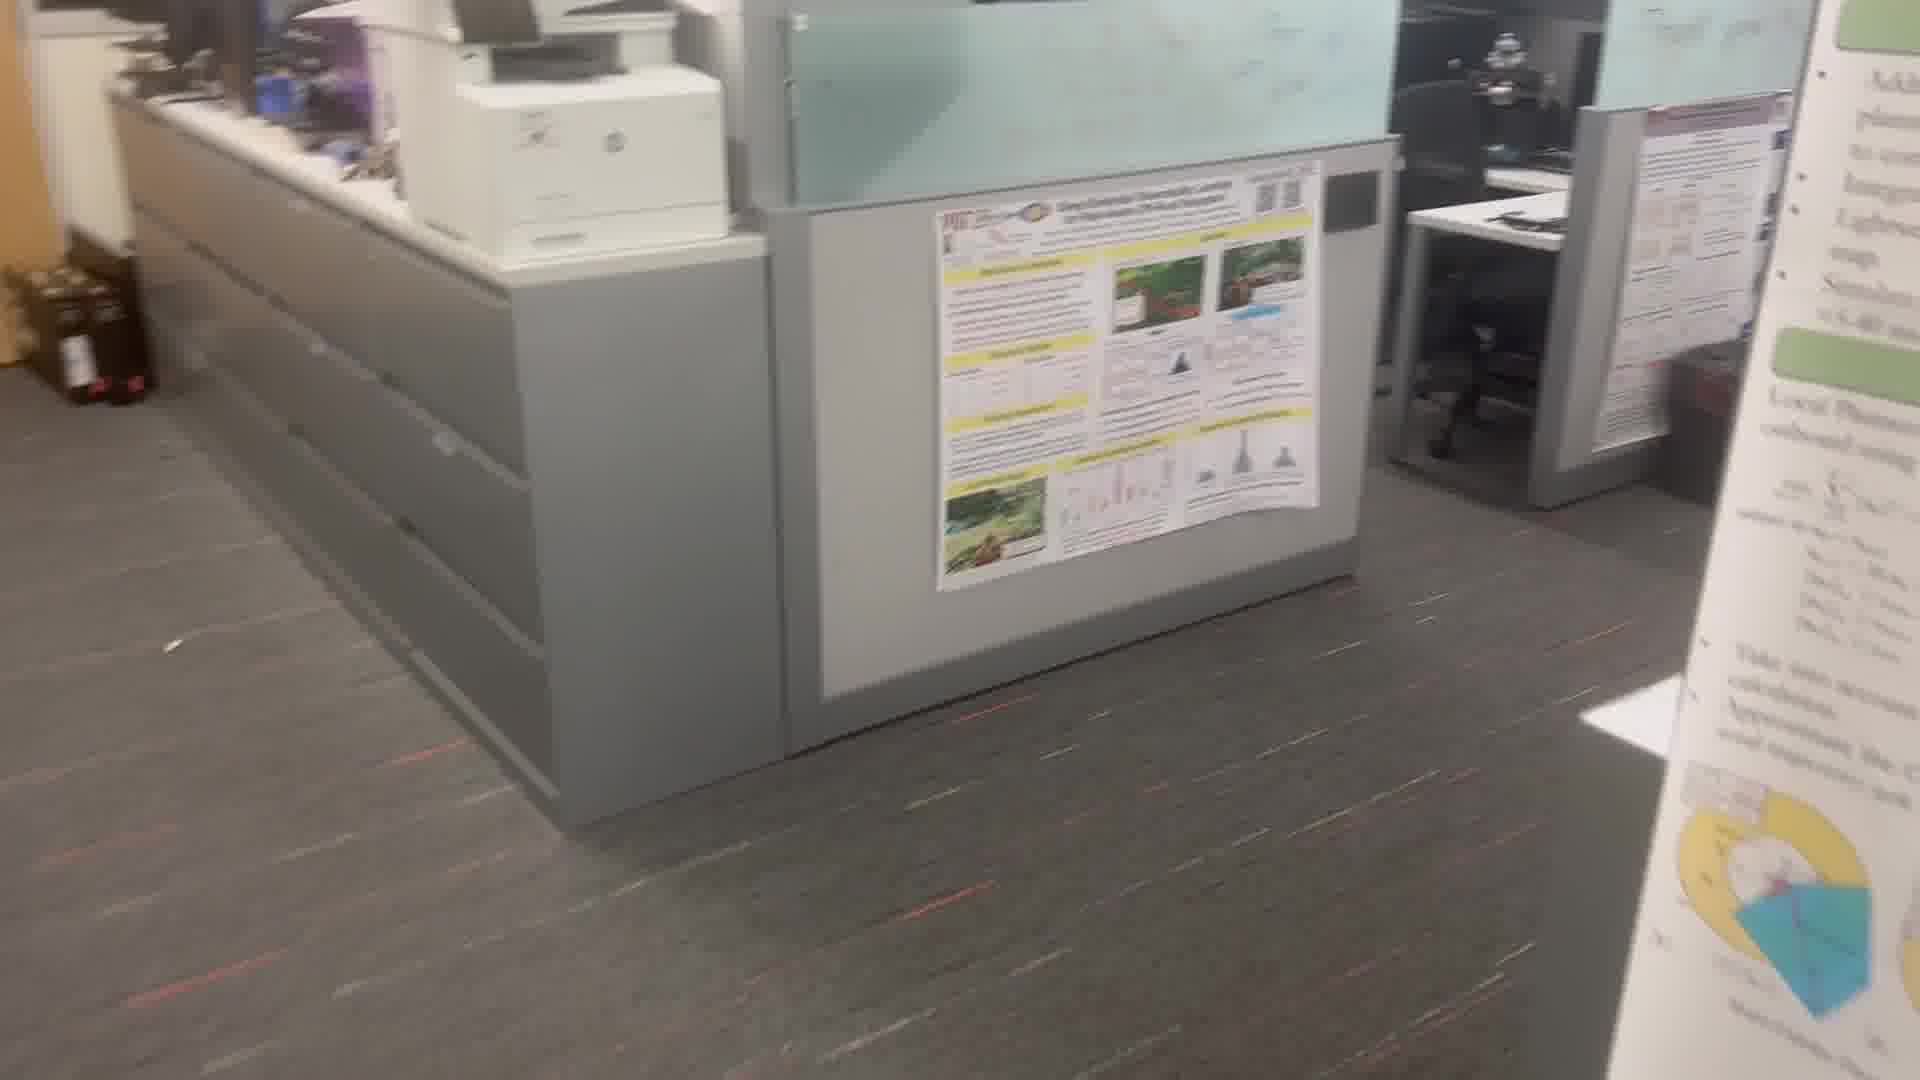
- library
vggt-slam 4배속 (중간에 OOM 떠서 끊음) 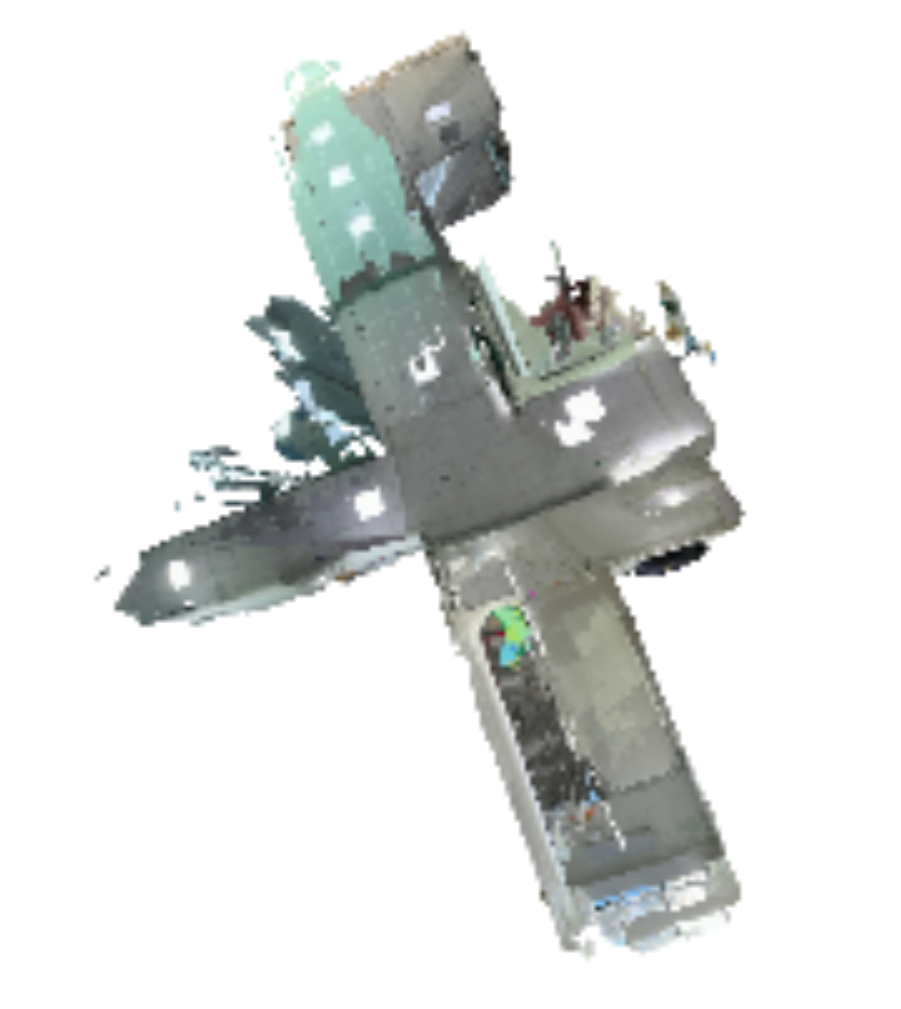
약간 다운샘플링된 지도
- nr_room
- 과정
Content
실습 세팅
GPU: 5070ti
CUDA: 12.8 nightly
명령어
git clone https://github.com/MIT-SPARK/VGGT-SLAM
cd VGGT-SLAM

conda create -n vggt-slam python=3.11
conda activate vggt-slam

chmod +x setup.sh
./setup.sh

unzip office_loop.zip
python3 main.py --image_folder office_loop --max_loops 1 --vis_map
만약
FileNotFoundError: [Errno 2] No such file or directory: '/home/wooseok(vggt-sl(vggt-sl(vggt((v(vggt(와 같은 오류가 난다면,위 사이트에서
dino_salad.ckpt다운 받은 후, 아래 명령어 실행cd ~/Download mv dino_salad.ckpt ~/.cache/torch/hub/checkpoints/ # 다시 실행 python3 main.py --image_folder office_loop --max_loops 1 --vis_mapcuda kernel오류가 나서cuda 12.8 nightly로 재설치pip uninstall torch torchvision torchaudio -y pip install --pre torch torchvision torchaudio \ --index-url https://download.pytorch.org/whl/nightly/cu128 # 실행 python3 main.py --image_folder office_loop --max_loops 1 --vis_map사용한 데이터셋
Office Loop
- 종류: RGB Image
- 수량: 473장
결과
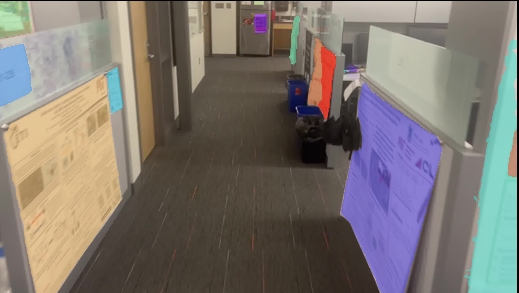
외부 내부 커스텀 데이터로 실습
nr_room 데이터셋
python3 main.py --image_folder datasets/nr_vggt --max_loops 1 --vis_map돌아는 가지만, 너무 느려서 중간에 끊음
도서관 데이터셋
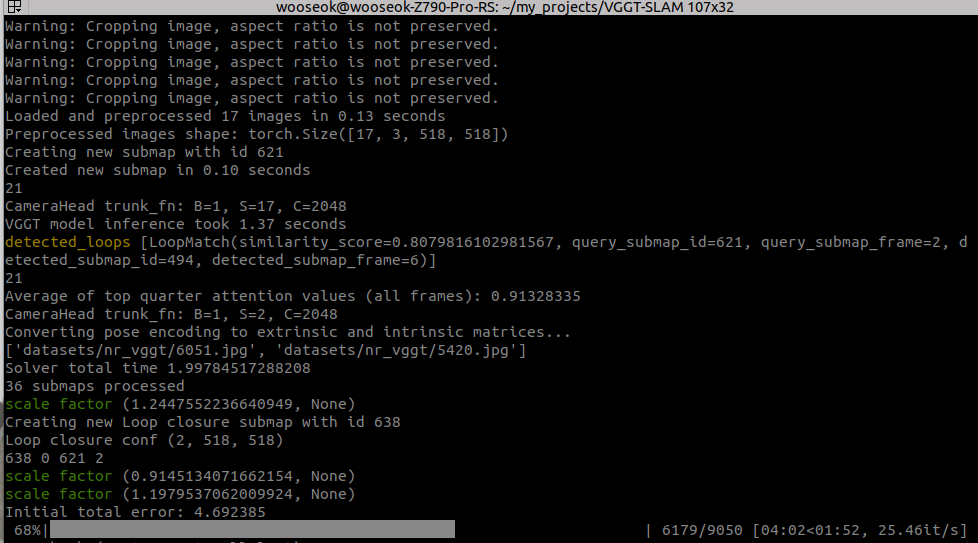
python3 main.py --image_folder datasets/library --max_loops 1 --vis_mapvggt-slam 4배속 (중간에 OOM 떠서 끊음) Appendix
이전에 mapanything으로 4층 도서관 데이터셋 안해본듯 하여 해봄
mapanything
# 도서관 데이터셋
python scripts/demo_colmap.py \
--images_dir=/home/wooseok/dataset/library \
--output_dir=/home/wooseok/dataset/library_ma \
--save_glb \
--voxel_fraction=0.001 \
--voxel_size=0.001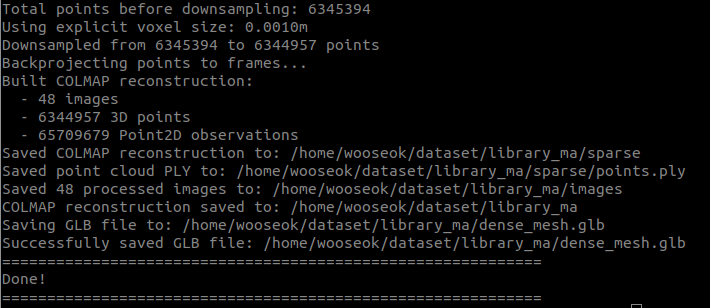

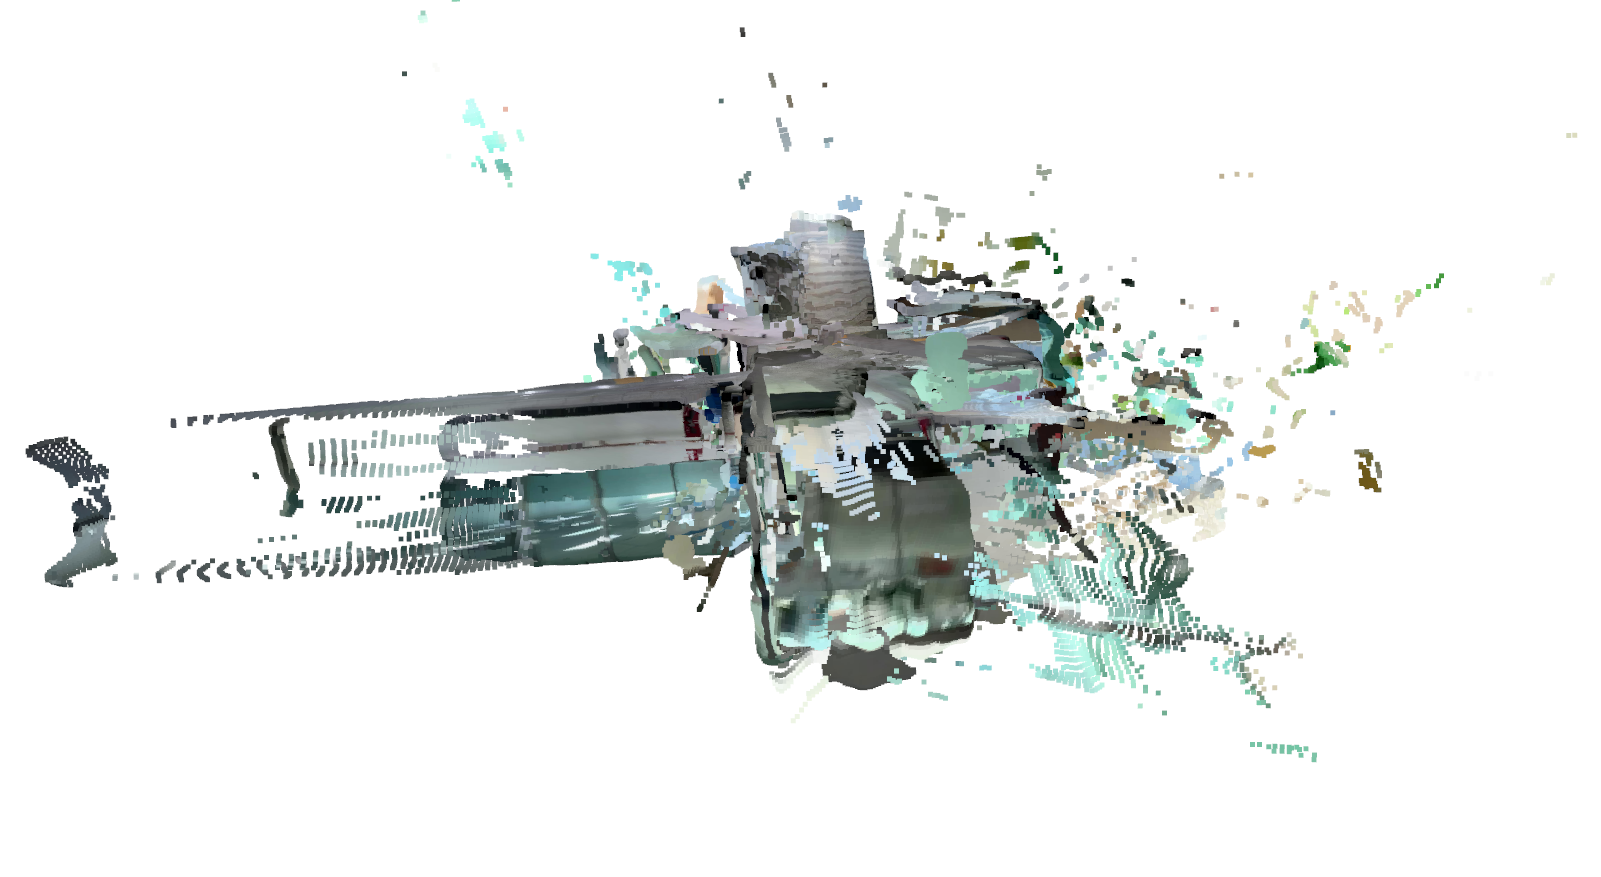
너무 작게 나와서, 간신히 확대해야 보임
3dgut
# library_ma
python train.py --config-name apps/colmap_3dgut.yaml \
path=data/library_ma out_dir=runs experiment_name=ma \
dataset.downsample_factor=1 with_gui=False export_ply.enabled=true
그리 결과가 좋지는 않았음
 https://github.com/MIT-SPARK/VGGT-SLAM?tab=readme-ov-file#quick-start
실습 (SLAM with open-set semantic search)
- querying 결과
office 데이터셋 (default)
Image Querying


OBB

커스텀 데이터셋
(갑자기 다 OOM 떠서 일단 중지…)
과정
- office 데이터셋
python3 main.py --image_folder datasets/office_loop \
--max_loops 1 \
--vis_map \
--run_os \
--log_results
- 커스텀 데이터셋 (nr_room)
python3 main.py --image_folder datasets/nr_vggt \
--max_loops 1 \
--vis_map \
--run_os \
--log_results \
--submap_size 8
- office 데이터셋
코드 분석
main.py먼저
main.py를 보니, 여러 헤더를import하고 있었다.헤더import os import glob import time import argparse import numpy as np import torch from torchvision.transforms.functional import to_pil_image from tqdm.auto import tqdm import cv2 import matplotlib.pyplot as plt import vggt_slam.slam_utils as utils from vggt_slam.solver import Solver from vggt_slam.submap import Submap from vggt.models.vggt import VGGT
눈에 띄는 것은 GPU를 활용한 SLAM이다 보니
pytorch를 활용하는 듯 보였고, 외부에서slam_utils,solver,submap,vggt를import해주고 있었다.다음은 터미널 명령어를 통해 받을 수 있는
argument들을 살펴보자인자parser = argparse.ArgumentParser(description="VGGT-SLAM demo") parser.add_argument("--image_folder", type=str, default="examples/kitchen/images/", help="Path to folder containing images") parser.add_argument("--vis_map", action="store_true", help="Visualize point cloud in viser as it is being build, otherwise only show the final map") parser.add_argument("--vis_voxel_size", type=float, default=None, help="Voxel size for downsampling the point cloud in the viewer (e.g. 0.05 for 5 cm). Default: no downsampling") parser.add_argument("--run_os", action="store_true", help="Enable open-set semantic search with Perception Encoder CLIP and SAM3") parser.add_argument("--vis_flow", action="store_true", help="Visualize optical flow from RAFT for keyframe selection") parser.add_argument("--log_results", action="store_true", help="save txt file with results") parser.add_argument("--skip_dense_log", action="store_true", help="by default, logging poses and logs dense point clouds. If this flag is set, dense logging is skipped") parser.add_argument("--log_path", type=str, default="poses.txt", help="Path to save the log file") parser.add_argument("--submap_size", type=int, default=16, help="Number of new frames per submap, does not include overlapping frames or loop closure frames") parser.add_argument("--overlapping_window_size", type=int, default=1, help="ONLY DEFAULT OF 1 SUPPORTED RIGHT NOW. Number of overlapping frames, which are used in SL(4) estimation") parser.add_argument("--max_loops", type=int, default=1, help="ONLY DEFAULT OF 1 SUPPORTED RIGHT NOW or 0 to disable loop closures.") parser.add_argument("--min_disparity", type=float, default=50, help="Minimum disparity to generate a new keyframe") parser.add_argument("--conf_threshold", type=float, default=25.0, help="Initial percentage of low-confidence points to filter out") parser.add_argument("--lc_thres", type=float, default=0.95, help="Threshold for image retrieval. Range: [0, 1.0]. Higher = more loop closures")
Argument Type Default Description --image_folderstr "examples/kitchen/images/"입력 이미지 폴더 경로 --vis_mapflag (bool) False 포인트 클라우드를 viser로 실시간 시각화 (미설정 시 최종 맵만 표시) --vis_voxel_sizefloat None 시각화 시 포인트 클라우드 다운샘플링 voxel 크기 (예: 0.05 = 5cm) --run_osflag (bool) False Perception Encoder CLIP + SAM3 기반 open-set semantic search 활성화 --vis_flowflag (bool) False RAFT optical flow를 keyframe 선택 과정에서 시각화 --log_resultsflag (bool) False 결과를 txt 파일로 저장 --skip_dense_logflag (bool) False dense point cloud 로그 생략 (기본은 포함) --log_pathstr "poses.txt"로그 파일 저장 경로 --submap_sizeint 16 서브맵당 새 프레임 수 (overlap/loop closure 제외) --overlapping_window_sizeint 1 overlap 프레임 수 (현재 1만 지원) --max_loopsint 1 loop closure 최대 횟수 (1 또는 0만 지원) --min_disparityfloat 50 새로운 keyframe 생성 최소 disparity --conf_thresholdfloat 25.0 초기 low-confidence 포인트 필터링 비율 (%) --lc_thresfloat 0.95 loop closure용 이미지 retrieval threshold (0~1, 높을수록 엄격) 여기서 중요하게 봐야 할 파라미터들을 추려보면 아래와 같다.
--submap_size- 하나의 submap을 구성하는 프레임 수를 의미하는 파라미터
→ 클 수록 loop closure의 영향을 더 많이 받아 더 높은 성능을 끌어냄
- 하나의 submap을 구성하는 프레임 수를 의미하는 파라미터
--overlapping_window_size- 각 인접 submap이 몇 개의 프레임을 공유할지 결정하는 파라미터
--max_loops- 현재 submap에 대한 loop 후보를 몇 개 찾을 것인지에 대한 파라미터
--min_disparity- : 현재 프레임과 마지막 keyframe간 평균 이동량을 의미하는 파라미터
→ 새로운 keyframe을 만들지 판단하는 기준이 됌
- : 현재 프레임과 마지막 keyframe간 평균 이동량을 의미하는 파라미터
--conf_threshold- : 전체 confidence 의 평균값을 의미하는 파라미터
→ 이보다 작은 값을 가진 point를 pruning함
- : 전체 confidence 의 평균값을 의미하는 파라미터
--lc_thres- loop closure 후보를 찾기 위한 파라미터
→ 특정 submap의 similarity가 이보다 커야지 후보로 인정
- loop closure 후보를 찾기 위한 파라미터
main 함수초기화def main(): """ Main function that wraps the entire pipeline of VGGT-SLAM. """ args = parser.parse_args() use_optical_flow_downsample = True device = "cuda" if torch.cuda.is_available() else "cpu" print(f"Using device: {device}") solver = Solver( init_conf_threshold=args.conf_threshold, lc_thres=args.lc_thres, vis_voxel_size=args.vis_voxel_size ) print("Initializing and loading VGGT model...")Argument를 받아와, Solver에 대한 객체를 생성해주고 있다.
또한 opeical flow에 대해 downsampling option을 적용하는듯 보이며, 연산에 필요한 하드웨어 디바이스를 정의해주고 있다.
query 옵션 체크if args.run_os: from sam3.model_builder import build_sam3_image_model from sam3.model.sam3_image_processor import Sam3Processor import core.vision_encoder.pe as pe import core.vision_encoder.transforms as transforms sam3_model = build_sam3_image_model() processor = Sam3Processor(sam3_model, confidence_threshold=0.50) clip_model = pe.CLIP.from_config("PE-Core-L14-336", pretrained=True) # Downloads from HF clip_model = clip_model.cuda() clip_tokenizer = transforms.get_text_tokenizer(clip_model.context_length) clip_preprocess = transforms.get_image_transform(clip_model.image_size) else: clip_model, clip_preprocess = None, None clip_tokenizer = NoneCLIP과 SAM3를 기반으로 open-set semantic search를 진행할지 확인하는 조건문
(현재는 기본값이
false로 설정되어 있어 그냥 넘어감)
모델 로딩model = VGGT() _URL = "https://huggingface.co/facebook/VGGT-1B/resolve/main/model.pt" model.load_state_dict(torch.hub.load_state_dict_from_url(_URL)) model.eval() model = model.to(torch.bfloat16) # use half precision model = model.to(device) # Use the provided image folder path print(f"Loading images from {args.image_folder}...") image_names = [f for f in glob.glob(os.path.join(args.image_folder, "*")) if "depth" not in os.path.basename(f).lower() and "txt" not in os.path.basename(f).lower() and "db" not in os.path.basename(f).lower()] image_names = utils.sort_images_by_number(image_names) downsample_factor = 1 image_names = utils.downsample_images(image_names, downsample_factor) print(f"Found {len(image_names)} images")hugging face에서 pre-trained된 VGGT-1B 모델을 가져와주었고, 이를 바로 평가모드로 설정해 주었다. 또한 추론 단위는
bfloat16을 사용한다.이미지에 부적절한 네이밍이 있는지 확인하고, 원하는 비율로 downsampling을 진행해준다
(현재는 기본값이
1로 설정되어 있어 그냥 downsampling 안하는 것과 동일함)
SLAMimage_names_subset = [] count = 0 image_count = 0 total_time_start = time.time() keyframe_time = utils.Accumulator() backend_time = utils.Accumulator() for image_name in tqdm(image_names): if use_optical_flow_downsample: with keyframe_time: img = cv2.imread(image_name) enough_disparity = solver.flow_tracker.compute_disparity(img, args.min_disparity, args.vis_flow) if enough_disparity: image_names_subset.append(image_name) image_count += 1 else: image_names_subset.append(image_name) # Run submap processing if enough images are collected or if it's the last group of images. if len(image_names_subset) == args.submap_size + args.overlapping_window_size or image_name == image_names[-1]: count += 1 print(image_names_subset) t1 = time.time() predictions = solver.run_predictions(image_names_subset, model, args.max_loops, clip_model, clip_preprocess) print("Solver total time", time.time() - t1) print(count, "submaps processed") solver.add_points(predictions) with backend_time: solver.graph.optimize() loop_closure_detected = len(predictions["detected_loops"]) > 0 if args.vis_map: if loop_closure_detected: solver.update_all_submap_vis() else: solver.update_latest_submap_vis() # Reset for next submap. image_names_subset = image_names_subset[-args.overlapping_window_size:] total_time = time.time() - total_time_start average_fps = total_time / image_count print(image_count, "frames processed") print("Total time:", total_time) print(f"Total time for VGGT calls: {solver.vggt_timer.total_time:.4f}s") print("Average VGGT time per frame:", solver.vggt_timer.total_time / image_count) print("Average loop closure time per frame:", solver.loop_closure_timer.total_time / image_count) print("Average keyframe selection time per frame:", keyframe_time.total_time / image_count) print("Average backend time per frame:", backend_time.total_time / image_count) print("Average semantic time per frame:", solver.clip_timer.total_time / image_count) print("Average total time per frame:", total_time / image_count) print("Average FPS:", 1 / average_fps) print("Total number of submaps in map", solver.map.get_num_submaps()) print("Total number of loop closures in map", solver.graph.get_num_loops())- 변수
image_names_subset: submap을 의미count: 지금까지 처리한 submap 개수image_count: 현재 submap 내부의 프레임 개수total_time_start: 전체 연산 과정에 걸리는 시간을 측정하기 위한 변수keyframe_time: keyframe 추출에 걸리는 시간을 측정하기 위한 변수backend_time: back-end 과정에 걸리는 시간을 측정하기 위한 변수
- 과정
- keyframe 받기
- 모든 이미지에 대해서
use_optical_flow_downsample옵션이 켜져 있고, 평균 disparity가min_disparity를 초과하는 경우에 대해서만 새로운 keyframe을 받음(현재는 기본값으로
use_optical_flow_downsample옵션이 켜져있고, 만약 꺼진 경우에는 그냥 다음 이미지를 계속 새로운 keyframe으로 받음)
- 모든 이미지에 대해서
- submap 처리하기
- 현재 submap 내부 프레임 개수가
submap_size+overlapping_window_size일 때, 하나의 submap이 다 채워졌다고 판단하고 아래 과정 수행- submap
count증가
solver.run_predictions을 통해 VGGT로 특징점 추출solver.add_points를 통해 추출한 특징점 추가
- SLAM back-end
solver.graph.optimize를 통해 graph optimization 수행
vis_map을 통해 SLAM mapping 시각화 유무 결정
- 다음 submap을 현재 submap의 마지막
overlapping_window_size개수의 프레임으로 초기화
- submap
- 현재 submap 내부 프레임 개수가
- 결과 출력하기
- 각 과정별 수행 시간, 평균 fps, 생성된 submap 개수 등 출력
- 각 과정별 수행 시간, 평균 fps, 생성된 submap 개수 등 출력
- keyframe 받기
- 변수
query 옵션 실행if args.run_os: while True: # Prompt user for text input query = input("\nEnter text query or q to quit: ").strip() if len(query) == 0: print("Empty query. Exiting.") return if query == "q": print("Exiting.") return start_time = time.time() text_emb = utils.compute_text_embeddings(clip_model, clip_tokenizer, query) overall_best_score, overall_best_submap_id, overall_best_frame_index = solver.map.retrieve_best_semantic_frame(text_emb) found_submap = solver.map.get_submap(overall_best_submap_id) # Display image best_img = found_submap.get_frame_at_index(overall_best_frame_index) print("Score:", overall_best_score) with torch.no_grad(): # convert torch image to PIL best_img = to_pil_image(best_img) inference_state = processor.set_image(best_img) output = processor.set_text_prompt(state=inference_state, prompt=query) masks, boxes, scores = output["masks"], output["boxes"], output["scores"] print(f"Found {masks.shape[0]} masks from SAM3 for the prompt '{query}'") print("Scores:", scores.cpu().numpy()) print("Time taken for query:", time.time() - start_time) masked_img = utils.overlay_masks(best_img, masks) masked_img.show() for i in range(masks.shape[0]): mask = masks[i].cpu().numpy() obb_center, obb_extent, obb_rotation = utils.compute_obb_from_points(found_submap.get_points_in_mask(overall_best_frame_index, mask, solver.graph)) solver.viewer.visualize_obb( center=obb_center, extent=obb_extent, rotation=obb_rotation, color=(255, 0, 0), line_width=8.0, )run_os가 true일 경우, 부가 옵션을 실행부가 옵션
- query를 입력받고, CLIP을 통해 가장 관련있는 프레임 찾기
- 해당 프레임에 SAM3 query segmentation을 적용해, object mask 추출하기
- object mask에 대응하는 3차원 점을 찾고, 이를 map에서 box로 표시
부가 옵션 체크if not args.vis_map: # just show the map after all submaps have been processed solver.update_all_submap_vis() if args.log_results: solver.map.write_poses_to_file(args.log_path, solver.graph, kitti_format=False) # Log the full point cloud as one file, used for visualization. # solver.map.write_points_to_file(solver.graph, args.log_path.replace(".txt", "_points.pcd")) if not args.skip_dense_log: # Log the dense point cloud for each submap. solver.map.save_framewise_pointclouds(solver.graph, args.log_path.replace(".txt", "_logs"))부가 옵션
vis_map이 false일 경우, 모든 submap이 처리된 후에 시각화 진행
log_results가 true일 경우, pose, full point cloud를 파일로 저장skip_dense_log가 true이면, 각 submap별 dense point cloud 저장
slam_utils.py헤더import os import re import numpy as np import matplotlib import scipy import time from PIL import Image from torchvision import transforms as TF import torch필요한 패키지 import (딱히 특별한 부분은 없음)
slice_with_overlapdef slice_with_overlap(lst, n, k): if n <= 0 or k < 0: raise ValueError("n must be greater than 0 and k must be non-negative") result = [] i = 0 while i < len(lst): result.append(lst[i:i + n]) i += max(1, n - k) # Ensure progress even if k >= n return result인자
lst: 이미지 배열
n: submap 크기
k: overlapping window 크기
하는 일
- overlap을 고려해서 submap을 생성하고, 이를 반환하는 함수
sort_images_by_numberdef sort_images_by_number(image_paths): def extract_number(path): filename = os.path.basename(path) # Look for digits followed immediately by a dot and the extension match = re.search(r'\d+(?:\.\d+)?(?=\.[^.]+$)', filename) return float(match.group()) if match else float('inf') return sorted(image_paths, key=extract_number)인자
image_paths: 이미지 경로
하는 일
- 이미지 경로에 들어있는 정보를 기반으로 파일을 정렬하여 반환하는 함수
과정
- 경로에서 파일 이름을 찾고, 포함된 숫자를 추출
- 숫자 유무에 따라 조건 수행
- 숫자를 찾으면
→ float형으로 변환하여 정렬 수행
- 숫자를 못찾으면
→ infinity를 return하여 가장 뒤쪽에 정렬 수행
- 숫자를 찾으면
- 정렬된 값 반환
downsample_imagesdef downsample_images(image_names, downsample_factor): """ Downsamples a list of image names by keeping every `downsample_factor`-th image. Args: image_names (list of str): List of image filenames. downsample_factor (int): Factor to downsample the list. E.g., 2 keeps every other image. Returns: list of str: Downsampled list of image filenames. """ return image_names[::downsample_factor]인자
image_names: 이미지 배열
downsample_factor: 다운샘플링 비율
하는 일
downsample_factor단위로 프레임을 샘플링하여 반환하는 함수
decompose_cameradef decompose_camera(P, no_inverse=False): """ Decompose a 3x4 or 4x4 camera projection matrix P into intrinsics K, rotation R, and translation t. """ if P.shape[0] != 3: P = P / P[-1,-1] P = P[0:3, :] # Ensure P is (3,4) assert P.shape == (3, 4) # Left 3x3 part M = P[:, :3] # RQ decomposition K, R = scipy.linalg.rq(M) # Make sure intrinsics have positive diagonal if K[0,0] < 0: K[:,0] *= -1 R[0,:] *= -1 if K[1,1] < 0: K[:,1] *= -1 R[1,:] *= -1 if K[2,2] < 0: K[:,2] *= -1 R[2,:] *= -1 scale = K[2,2] # print("Scale factor from K[2,2]:", scale) if not no_inverse: R = np.linalg.inv(R) t = -R @ np.linalg.inv(K) @ P[:, 3] else: t = np.linalg.inv(K) @ P[:, 3] K = K / scale return K, R, t, scale인자
P: 투영행렬
no_inverse:
하는 일
- 카메라 투영행렬
P를 내부 파라미터(K), 회전(R), 이동(t)으로 분해하여 정규화 이전scale과 함께 반환하는 함수
과정
- 만약
P가 4x4면, 정규화 후 3x4로 변환
P의 왼쪽 3x3 부분을M으로 설정
M을K,R로 분해- 여기서
K의 대각선 양수 보정 (양수여야 의미 있음)
K정규화 (카메라 행렬은 스케일이 애매함 (homogeneous))
- 여기서
t계산
no_inverse옵션- 기본값: False (월드 → 카메라 좌표 변환)
- 만약 True면, 반대로 카메라 → 월드 좌표 변환
- 기본값: False (월드 → 카메라 좌표 변환)
- 값 반환
P,K,t,scale
compute_image_embeddingsdef compute_image_embeddings(model, preprocess, image_paths, batch_size=64, device="cuda"): all_embs = [] # Load all images into memory (PIL -> tensor) imgs = [] for p in image_paths: img = Image.open(p).convert("RGB") imgs.append(preprocess(img)) # Stack into a single tensor imgs = torch.stack(imgs).to(device) # Loop over batches with torch.no_grad(): for i in range(0, len(imgs), batch_size): batch = imgs[i : i + batch_size] emb = model.encode_image(batch) emb = emb / emb.norm(dim=-1, keepdim=True) all_embs.append(emb.cpu()) # Combine into one (N, D) array return torch.cat(all_embs, dim=0).numpy()인자
model: 인코더
preprocess: 전처리기
image_paths: 이미지 경로
batch_size: 배치 수
device: 연산 기기
하는 일
- 이미지들을 임베딩 벡터로 인코딩하고, 합쳐서 반환하는 함수
과정
- 이미지를 RGB로 변환
- 변환된 모든 이미지들을 단일 tensor로 변환
batch_size단위로 인코딩 진행 및 정규화하여all_embs에 저장
all_embs의 모든 값들을 이어 붙여 (N, D) 형태로 반환- N: 이미지 개수
- D: 임베딩 차원
compute_text_embeddingsdef compute_text_embeddings(clip_model, tokenizer, text, device="cuda"): with torch.no_grad(): text_tokens = tokenizer([text]).to(device) text_emb = clip_model.encode_text(text_tokens) text_emb = text_emb / text_emb.norm(dim=-1, keepdim=True) return text_emb.cpu().numpy()인자
clip_model: CLIP 모델
tokenizer: 텍스트를 숫자로 변환해주는 도구
text: 텍스트
device: 연산 기기
하는 일
- CLIP 모델로 텍스트를 임베딩 및 정규화하여 반환하는 함수
cosine_similaritydef cosine_similarity(a, b): """ Compute cosine similarity between two vectors a and b. """ a = a / np.linalg.norm(a, axis=-1, keepdims=True) b = b / np.linalg.norm(b, axis=-1, keepdims=True) return a @ b.T인자
a,b: 벡터
하는 일
- 두 벡터의 코사인 유사도를 구해 반환하는 함수
normalize_to_sl4def normalize_to_sl4(H): """ Normalize a 4x4 homography matrix H to be in SL(4). """ det = np.linalg.det(H) if det == 0: raise ValueError("Homography matrix is singular and cannot be normalized.") scale = det ** (1/4) H_normalized = H / scale return H_normalized인자
H: homohraphy 행렬
하는 일
H의 determinant를 1로 만들어, SL(4) 상으로 정규화하여 반환하는 함수
compute_obb_from_pointsdef compute_obb_from_points(points: np.ndarray): """ Compute an oriented bounding box (OBB) for a Nx3 point cloud. Returns: center : (3,) world-space center of OBB extent : (3,) lengths of OBB along its principal axes rotation : (3,3) rotation matrix (columns = principal axes) """ assert points.ndim == 2 and points.shape[1] == 3, "Input must be Nx3 points" # Remove NaN/inf if any points = points[np.isfinite(points).all(axis=1)] if len(points) == 0: raise ValueError("Point cloud is empty or invalid") # 1. Compute centroid centroid = points.mean(axis=0) # 2. PCA on centered points centered = points - centroid cov = np.cov(centered, rowvar=False) # Eigen decomposition (sorted by eigenvalue descending) eigvals, eigvecs = np.linalg.eigh(cov) order = np.argsort(eigvals)[::-1] eigvecs = eigvecs[:, order] rotation = eigvecs # columns = principal axes (R) # 3. Project points to PCA frame points_local = centered @ rotation # 4. Compute min/max in PCA frame → box extents min_corner = points_local.min(axis=0) max_corner = points_local.max(axis=0) extent = max_corner - min_corner # 5. Compute box center (local), then world center_local = 0.5 * (min_corner + max_corner) center_world = centroid + center_local @ rotation.T return center_world, extent, rotation인자
points: 3차원 점군
하는 일
- 3차원 점군을 입력받아 최소한의 방향성을 가진 OBB를 반환하는 함수
과정
- 입력 체크 및 정리
- 중심점(centroid) 계산
- PCA(주성분 분석) 수행
- 점군을 PCA 기준으로 변환
- OBB 크기 및 중심 계산
- 값 반환
center_world,extent,rotation
overlay_masksdef overlay_masks(image, masks): image = image.convert("RGBA") # masks: (N, 1, H, W) or (N, H, W) masks = (255 * masks.cpu().numpy()).astype(np.uint8) n_masks = masks.shape[0] cmap = matplotlib.colormaps.get_cmap("rainbow").resampled(n_masks) colors = [ tuple(int(c * 255) for c in cmap(i)[:3]) for i in range(n_masks) ] for mask, color in zip(masks, colors): # Ensure mask is 2D mask = np.squeeze(mask) # Now mask is shape (H, W) mask = Image.fromarray(mask) overlay = Image.new("RGBA", image.size, color + (0,)) alpha = mask.point(lambda v: int(v * 0.5)) overlay.putalpha(alpha) image = Image.alpha_composite(image, overlay) return image인자
image: 이미지
masks: SAM 마스크
하는 일
- 이미지 위에 여러 마스크를 반투명 색으로 겹쳐서 반환하는 함수
Accumulatorclass Accumulator: def __init__(self): self.total_time = 0 def __enter__(self): self.start = time.perf_counter() return self def __exit__(self, *args): self.total_time += (time.perf_counter() - self.start)하는 일
with블록 안에서 코드 실행 시간을 측정하고 누적하는 간단한 타이머 클래스
solver.py
Comments